Selecting and installing a cupola may be easier than you think
by Karen Knapstein
Adding a cupola or two can really dress up a garage, barn, gazebo, or shed. It’s a detail that contributes to the overall finished appearance and adds distinction to an otherwise nondescript building. If you’re not familiar with cupola installation, once you find out how easy it is, you may decide it’s a good way to bump up the appeal and profitability of your next outbuilding project.
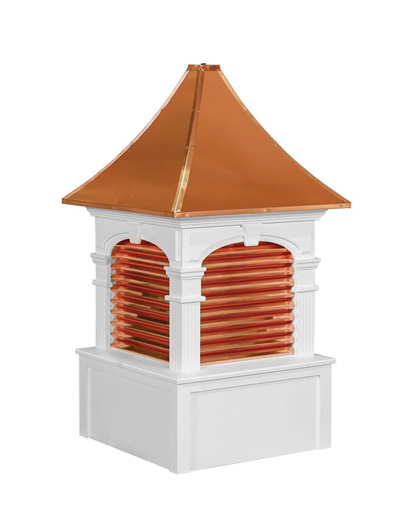
Louvered cupola from Royal Crowne Cupolas. Square base.
Steve Fisher of Royal Crowne, Paradise, Pennsylvania, shared some valuable advice for builders about cupolas. He said the most important factor in choosing a cupola is the size. Royal Crowne advises 1¼” of cupola per linear foot of uninterrupted roof line. For example: If your building’s roof ridge is 40′ long, the calculation would be: 40 x 1.25 = 50, so the cupola should measure 50″ across at the base to look “right” for the building.
Fisher added that most people don’t maintain their cupolas, so you want to encourage your customer to think about whether or not they are going to want to or be able to climb up on their roof for maintenance. The maintenance-free aspect of the cellular PVC vinyl construction makes Royal Crowne’s cupolas doubly appealing.
While the biggest demand is for white cupolas, they can also apply a special paint to color-match many different wall and roof exteriors. Accents and details can also be added, including copper cladding, windows, moulding, louvers, stained glass, and simple or ornate weathervanes.
In some cases, vinyl won’t look right; it won’t fit. If a building has stained wood siding, a cupola with a wood finish would be more appropriate. Western red cedar is a premium grade of wood, naturally preserved from rot. It’s a good choice if you need to match the look of a wood building.
Cupola Installation (Square Base)
Royal Crowne cupolas come in three sections: the base (“box”), the midsection (housing any windows and louvers), and the roof. Fisher said most are fairly easy to install thanks to the sectional construction. They are installed over existing roofing materials and require basic carpentry tools and the knowledge of how to use them.
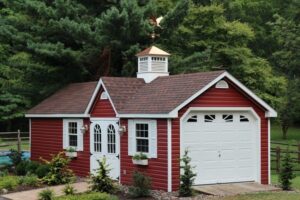
Waterford Cupola on garden shed.
According to the Royal Crowne directions, to install a decorative cupola with a square base, first determine the roof pitch. This is easily done by making a template for the angled cutout. To make a roof pitch template: Screw two 1″ x 3″ boards together so they pivot, then straddle the roof with the pivot at the peak and each “leg” placed flat against the roof. Mark the boards and add another screw so the boards will no longer move. (The length of the boards needed will depend on the size of the cupola base.) Use the template to mark the cupola base on opposite sides and cut out the “V” to fit over the peak.
Once the cutout is complete, the cupola base is fitted and leveled on the roof peak and cleats of pressure-treated 2″ x 4″ lumber are positioned snug against the inside walls and mounted onto the roof with 3″ wood screws. The base section is fastened to the 2″ x 4″ blocking from the outside. Apply a bead of clear silicone caulk at the seams where the cupola base meets the ridge vent.
The midsection slips over the base and is fastened through pre-drilled holes with the provided screws. The roof section slides down over the middle section, and that, too, is fastened through pre-drilled holes with the provided screws.
While cupolas with bases shaped other than a square are a bit more involved, Royal Crowne provides complete instructions and installation videos. [See www.royalcrowne.com.] Some makers build their cupolas in one piece. Fisher said those are “more of a chore to install.”
If your customers tend to want to stand out from their neighbors, a cupola may be what they need — and they may just need you to install it for them. GCSB